Ntfs Can Be Read by Both Mac and Windows
Want to apply NTFS drives on a Mac? In this guide nosotros show you how to use those Windows-formatted drives in macOS.
The Mac versus PC debate isn't going to be settled anytime presently but there's no denying that Windows computers are more widespread. For this reason, many manufacturers of external hard drives and USB sticks pre-format their devices to NTFS.
This format was created for Microsoft and allows users to quickly plug their drives into Windows machines and work with files. Equally NTFS is proprietary, Apple would need a special license to employ it fully on the Macs they sell.
Instead of doing this, macOS has been designed to read NTFS-formatted drives but not write to them. In other words, as a Mac user you can only open and view files on Windows drives: you lot tin't alter them in anyway, nor can y'all copy new files to NTFS format disks.
In this guide, you'll observe several solutions to this dilemma from formatting drives to a more universal file organisation to using third-party tools.
one. Format to FAT32
If you have an NTFS drive y'all tin apply macOS' Deejay Utility to reformat it to FAT32. This is unproblematic to practise and ways the information on your bulldoze/USB stick can be read and written on both Macs and PCs.
Exist enlightened that the FAT32 format isn't as efficient as NTFS: it merely supports files sizes of up to 4GB. This may pose a problem if you're using the bulldoze to shop high-quality videos. More data on FAT32 versus NTFS is available from Microsoft Support.
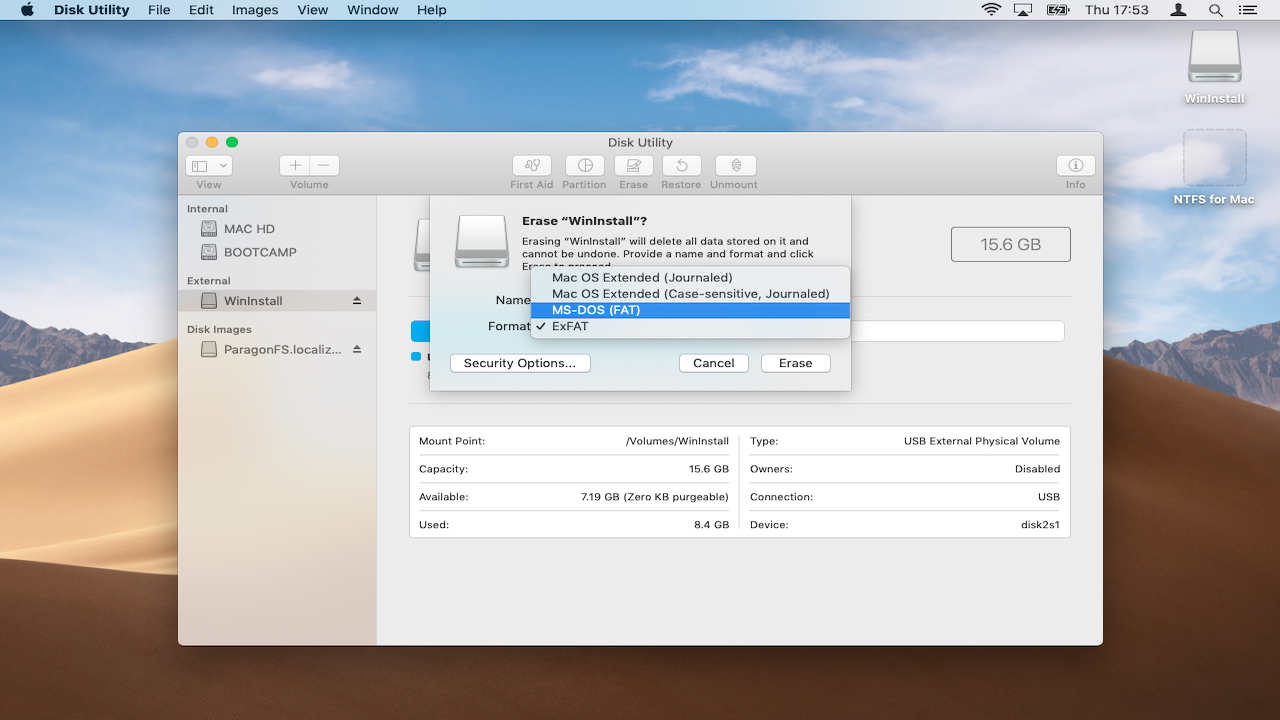
To get started, click the Spotlight icon at the acme right of your screen and enter 'Deejay' to launch Deejay Utility. Insert your NTFS bulldoze or USB stick and click to highlight the deejay name in the white box on the left-mitt side of the window.
Select the 'Erase' tab. Under 'Format' choose '(MS-DOS Fatty)'. Enter a new name for the drive in the field above if you wish.
Click 'Erase' to continue. Read the warning advisedly before proceeding, as this process will delete any existing data on the bulldoze. From now on you'll be able to move files to your drive and edit them in place from a Mac or PC.
two. Apply a third-party app
The fact that macOS doesn't support Windows NTFS drives out of the box has led to the development of a number of third-party apps, which are licensed to both read and write to Windows disks.
These tin can exist particularly helpful if you regularly accept to plug your drive into both a Mac and PC both use file sizes larger than that supported by the more than universal FAT32 format.
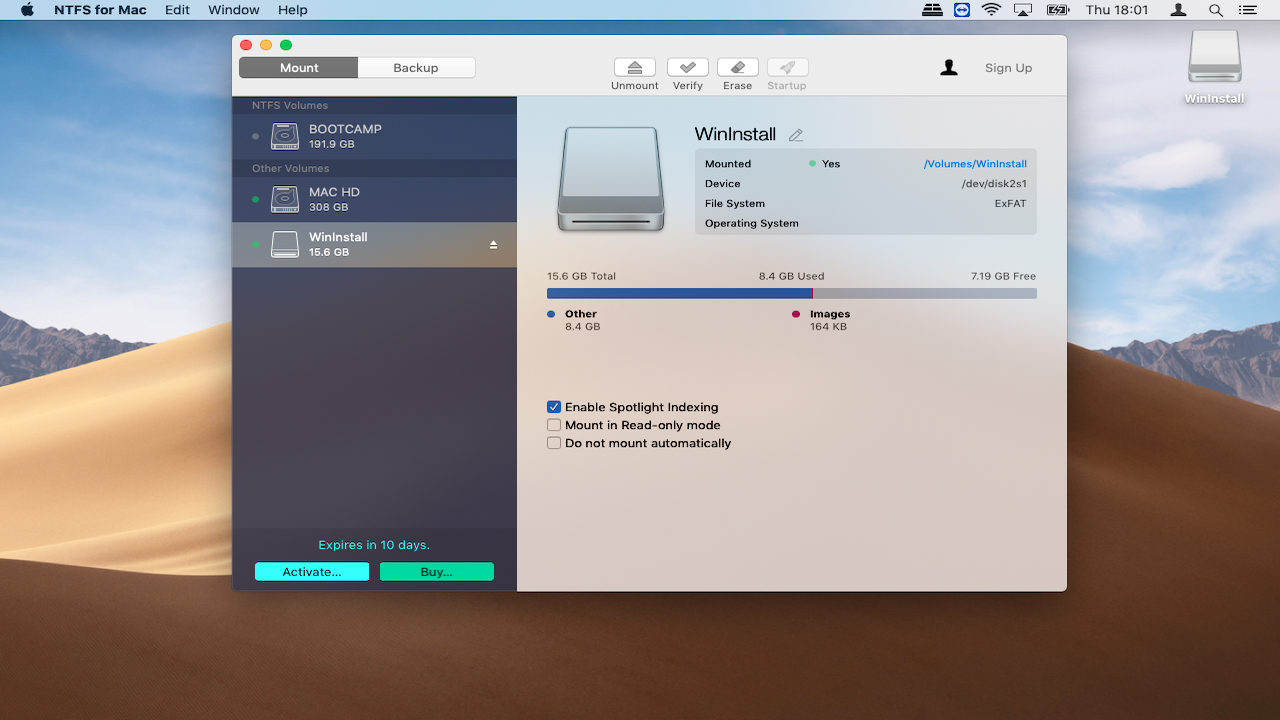
One of the strongest contenders for macOS is Microsoft NTFS for Mac by Paragon, which offers a ten-day free trial of its features. Once installed, the app will mount your Windows drives allowing you to change or remove files to your hearts content.
At the time of writing in that location doesn't seem to be any freeware macOS programs offer NTFS write support, which may put off users on a upkeep.
3. Enable NTFS write support in Final
If reformatting your NTFS drive for Mac is not an pick, you can enable write support for specific Windows disks using macOS Terminal. This is an experimental characteristic and could lead to data loss, so brand sure to do a full backup of both your Mac and whatsoever data on the drive earlier continuing.
The main benefit of using Terminal in this way is that it'south quick to do and no third-political party software is required. As this characteristic is yet in the testing phase however, your files could become corrupted at anytime, and then keep with circumspection.
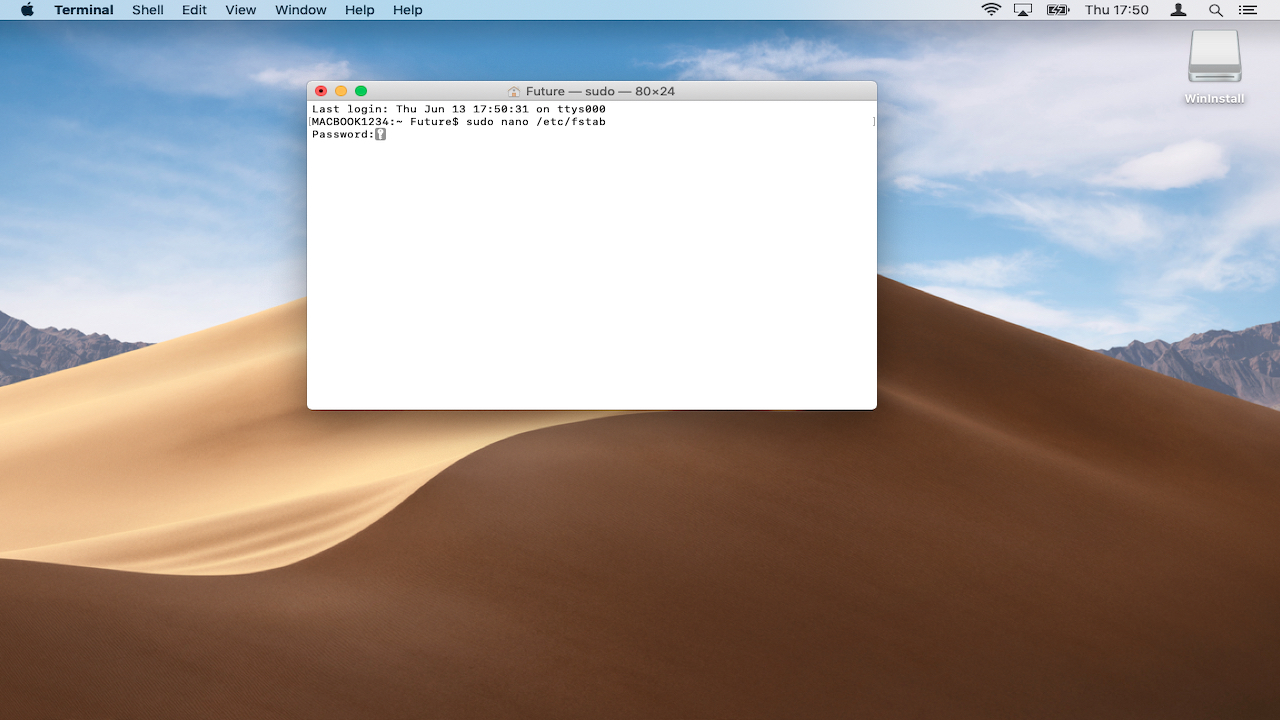
To become started, click the Spotlight icon at the tiptop correct of your screen and enter 'Concluding'. Connect your NTFS bulldoze, then enter the command:
sudo nano /etc/fstab This will open up the list of drives recognised by macOS. Utilise the arrow keys on your keyboard to scroll to the very end and add the post-obit line, replacing 'NAME' with the actual name of your NTFS drive east.thou. USB1 (if you're unsure what this is, but open Disk Utility):
LABEL=NAME none ntfs rw,auto,nobrowse Press Ctrl+O to relieve the list, and then press Ctrl+X to leave NANO. Adjacent, connect your Windows drive to the Mac.
Open Finder, and then click Get'> Go to Folder, so type '/Volumes/NAME' where 'Name' is the proper name of your NTFS drive.
Click 'Go' to access your Windows disk. You should now be able to edit existing files and copy new ones here.
4. Use BootCamp
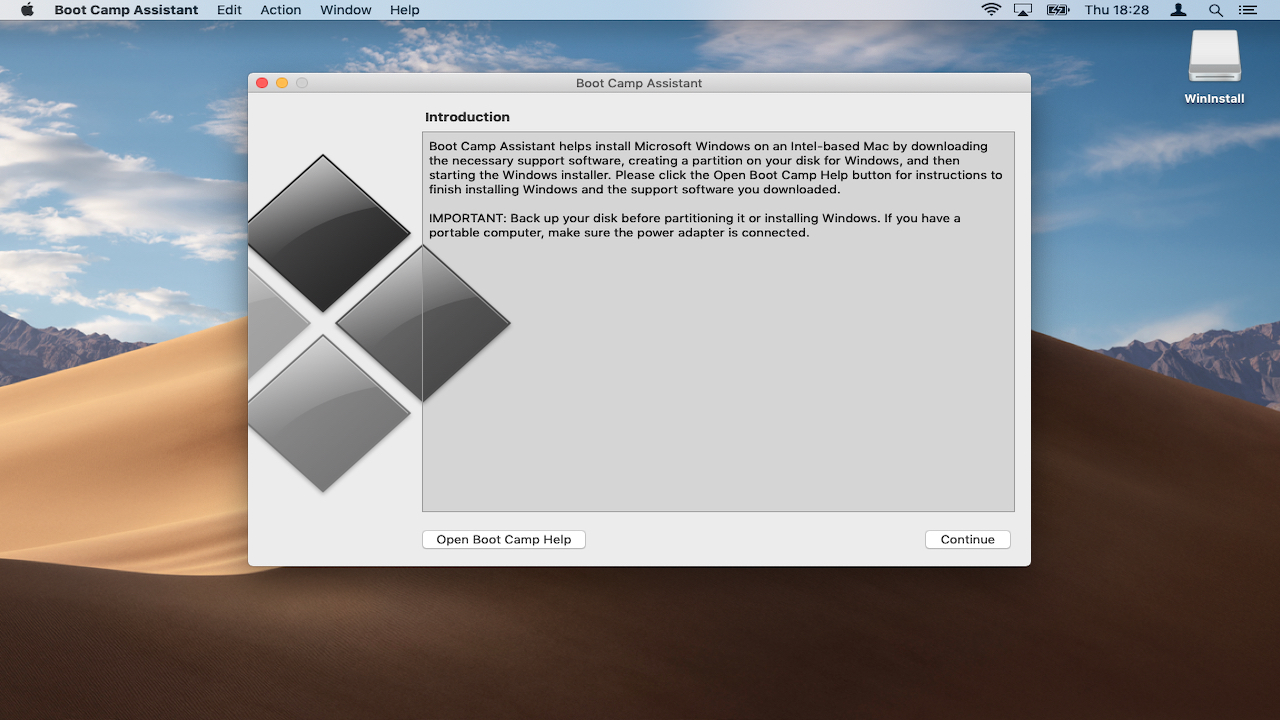
Bootcamp is macOS' own congenital-in utility for installing Microsoft Windows on your Mac. The most contempo version of macOS (Mojave) supports Windows x. During the setup procedure, users compress the size of their existing macOS installation to make room for Windows.
This allows you to kick both operating systems on your Mac. Once prepare, Windows x will function on your Mac in just the same way as information technology would on a regular PC. This includes working with NTFS-formatted drives.
To get started, all you need is an net connexion, a valid Windows 10 DVD and a USB stick of at least 8GB. See our guide on setting up BootCamp for more details on how to get started.
Although BootCamp is easy to prepare upwards and use, yous must purchase a Windows x license to go along using the OS later on 90 days. You'll also naturally will have to work with files using Microsoft apps instead of those designed for Mac like iMovie.
If you enjoy using the iWorks app however (Pages, Keynotes & Numbers), you lot tin work with the online versions of these tools on a PC by accessing iCloud via your browser.
When using BootCamp call up that whatsoever files you save to the Windows x department of the hard deejay itself can't be accessed when you reboot into macOS and vice versa.
v. Move to the Cloud
If you but want to piece of work or interact on a few files, why not ditch the drives altogether and place your files in the Deject?
Online services such as iCloud Drive offer a generous gratuitous allowance (5GB) and allow yous to immediately sync, edit and share files fifty-fifty if they were originally created for Windows and saved to an NTFS disk.
To take advantage of iCloud, simply open your Windows drive in Finder then copy and paste any files you want to work with to the location 'iCloud Drive'. If yous don't see this is the side pane, open Organization Preferences > iCloud to bank check you're signed in and that this service is enabled.
The Mac operating system will automatically sync the files to Apple's servers. Once you've opened the files and made any changes you demand, you can ship a sharing link to others if you wish.
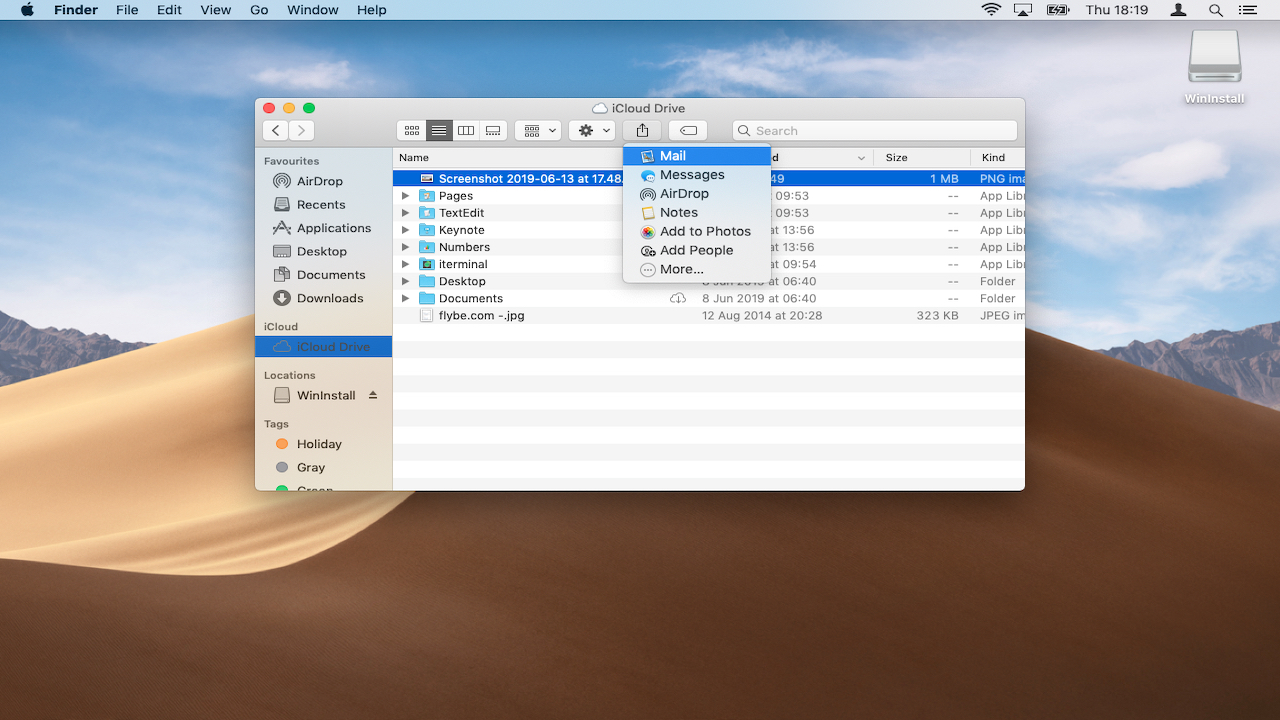
To do this, right-click on whatsoever file, then hover your mouse over 'Share'. From hither you can choose various methods to send your sharing link e.g. via 'Mail'.
- The 50 all-time Mac tips, tricks and timesavers
Source: https://www.techradar.com/how-to/how-to-use-ntfs-drives-on-a-mac#:~:text=If%20you%20have%20an%20NTFS,sizes%20of%20up%20to%204GB.
0 Response to "Ntfs Can Be Read by Both Mac and Windows"
إرسال تعليق